How to Fit a Water Butt (Expert Guide)
This is the complete guide to installing a water butt. It covers:
- How to choose a water butt
- How to install a water butt
- Best ways to use a water butt
So, if you’re tired of watching the April showers drain away before being hit with hosepipe bans in May and June, then this guide will help you save money and harness the water that falls on your land.
Let’s get started.
Choosing a Water Butt
There are a wide variety of water butts. These range from slimline water butts that are designed to fit even the smallest gardens, to recycled water butts made from standard garden bins, to even stylish designer water butts made by the big fashion houses (ok, maybe not fashion houses, but they still look pretty).
Before you read about how to install a water butt, it’s important to have an idea of what water butt you intend to install. Different water butts will require a different installation technique depending on their design.
Here we list the main types of water butts available and the variety of challenges each style may pose.
Standard Water Butts
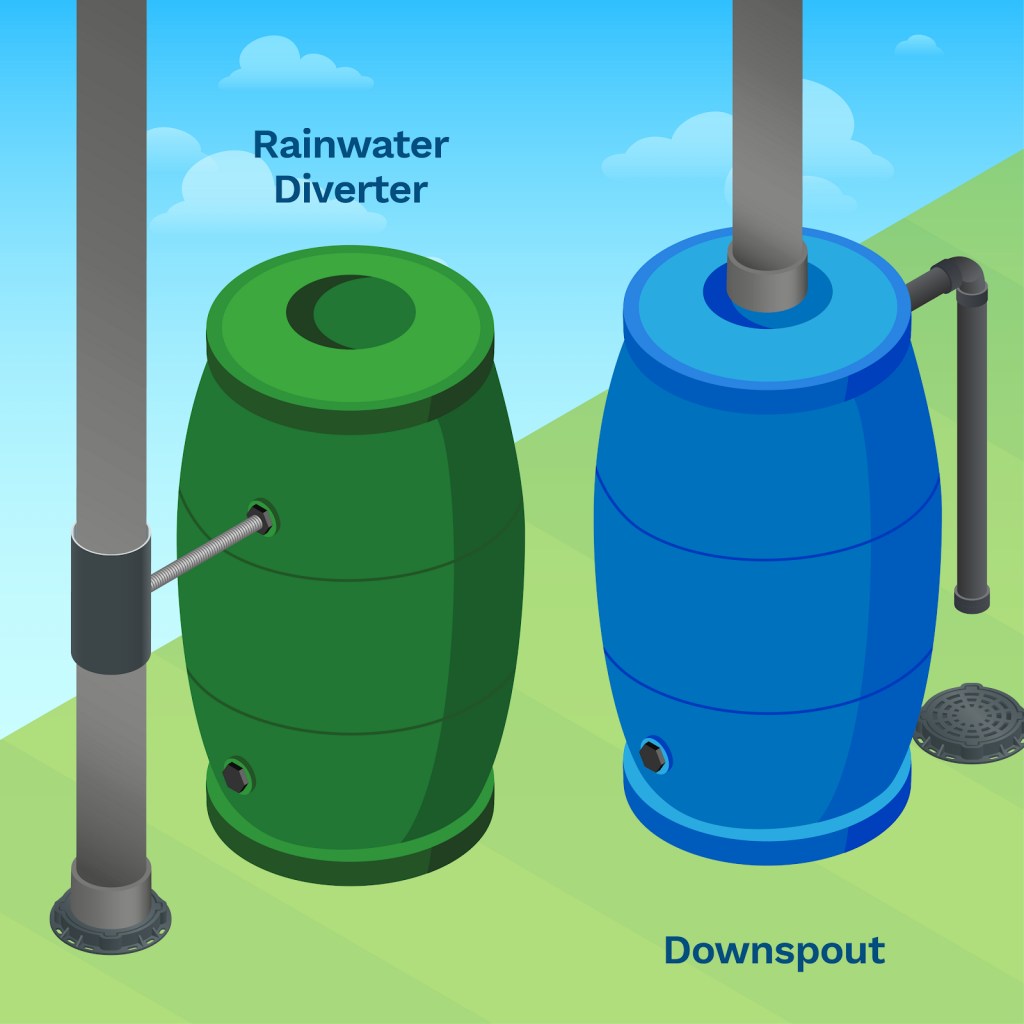
A standard water butt is about 1 metre tall and half a metre wide with a tank capacity of 210 litres. You can choose between downspout replacement installation, which means your water butt would sit under a garden shed, garage or house with the downspout flowing directly into the water butt. In this case, you would need to install an overflow pipe to prevent water flooding in the event of heavy rain. Alternatively, you can also choose to install a rainwater diverter. This will divert a portion of the water from the downspout while also preventing the risk of flooding.
Slimline Water Butts
Slimline water butts are designed for installation in gardens with a small footprint. They generally have a capacity under 100 litres, so will need to collect water via a rainwater diverter. A great option if you’re looking to save on space.
Recycled Water Butts
Many people opt to use an old garden bin as their water butt. If you’re considering this option, then you will need to purchase a converter kit to ensure you can easily divert and access the water. This will usually involve drilling two holes in the bin, one for the tap and one for the pipe connection. Similar to the slimline water butt, this butt will need to be installed using a rainwater diverter due to the limited water capacity.
Stylish Designer Water Butts
If you have a particularly stylish garden or just don’t fancy having a big green barrel cluttering your yard, you can now purchase stylish designer water butts. Ranging from terracotta plant pots to old refurbished whisky barrels, you can choose from a wide variety of butts that will fit seamlessly with your garden.
Rainwater Harvesting Tank
For bigger gardens or allotments, you can also look at installing a rainwater harvesting tank. These are a lot more advanced than your standard water butts and you can purchase tanks that clean and filter your water, while also pumping water around a garden irrigation system. This is the rather advanced end of water conservation, but if you have a large garden with a variety of plants and vegetable patches, this could be a great option to help you save water and keep your garden healthy.
Important Note
Whether you go for a slimline or designer butt, all water butts should be sold with a lid. Water butts without lids can pose a drowning hazard to children, pets and wildlife, while open butts can breed bacteria due to debris entering the butt. If you have children, you should also invest in a water butt with a child-safe lid.
How to Install a Water Butt Pump
Step 1: Downspout Replacement or Rainwater Diverter
The first thing you need to do is decide between fitting your water butt as a downspout replacement or using a rainwater diverter.
A downspout replacement is where you cut off part of the downpipe and place the water butt directly below it. This will require the installation of an overflow pipe.
A rainwater diverter is a pipe connected to both the downspout and the water butt, allowing you to syphon off water without overflowing the butt. This is the more popular option, although it will require more effort and tools to install.
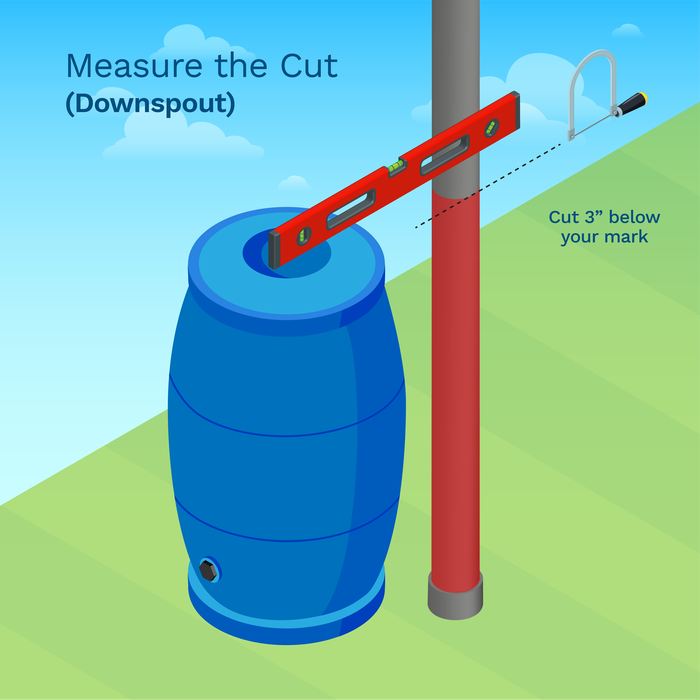
Step 2: Measure the Cut (Downspout Replacement)
To install your water butt, simply measure the height of your water butt, ensuring you mark the height on the downspout.
From there, you want to use a hacksaw to cut 3 to 4 inches below that marked height. That will allow enough room for the downspout to enter the water butt.
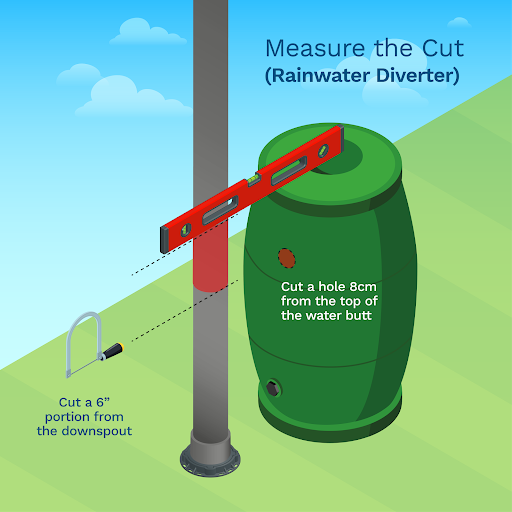
Step 2: Measure the Cut (Rainwater Diverter)
So, before you fit the rainwater diverter, you will need to make two different cuts. The first cut is made to the downspout.
To do this:
- Start by measuring the height of your water butt, marking the height on the downspout.
- From there, you need to use a hacksaw to cut a 6 inch (this size may vary, doublecheck that the size of your downspout connector corresponds to the size of your cut) portion out of the downspout.
Once you’ve completed the downspout cut, you then need to drill a hole in the water butt. This hole needs to:
- Be 8cm from the top of the water butt
- Correspond to the size of the rainwater diverter connector
Check the size of the hole you need to drill by measuring the diameter of your specific connector.
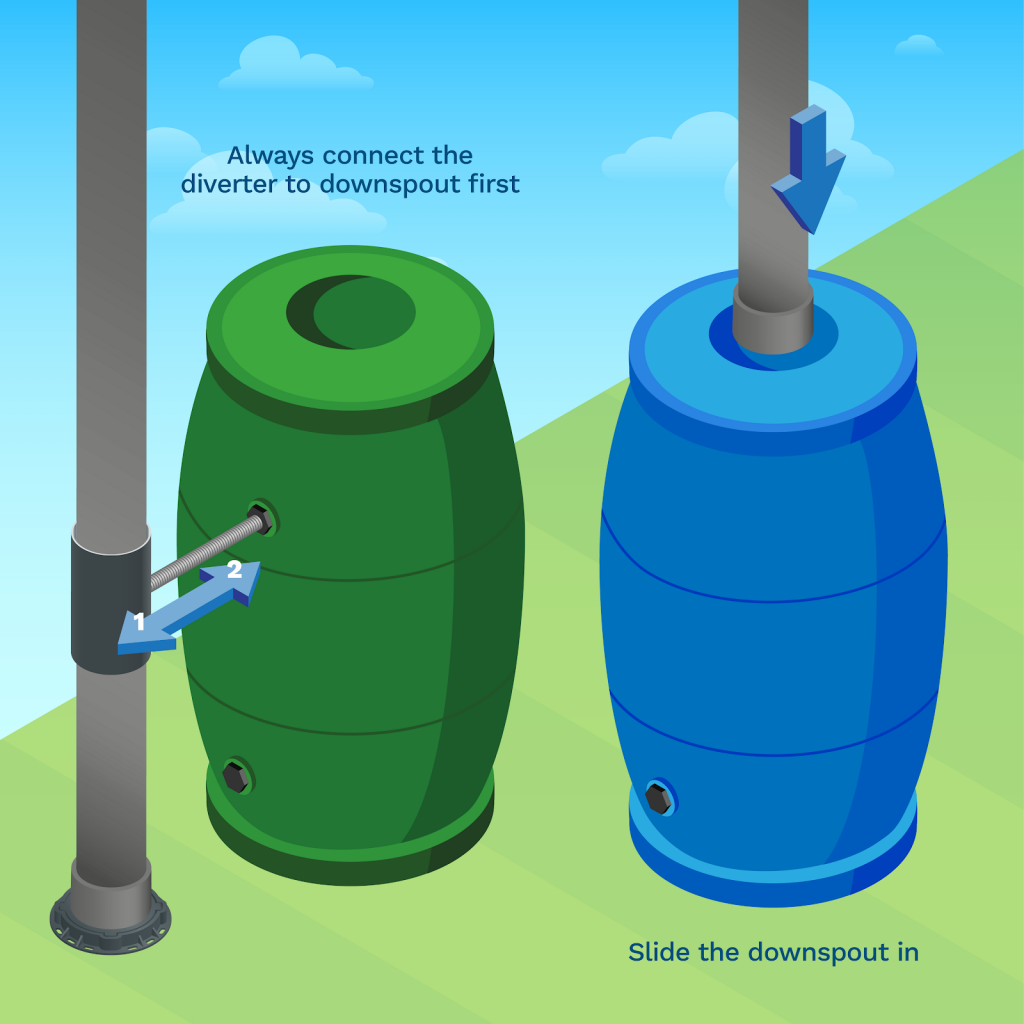
Step 3: Attach the downspout/rainwater diverter
If you’re installing a downspout, simply slide the downspout through the specially designed water butt hole. You can then move onto the final step below.
If you’re installing a rainwater diverter, you will need to
- Ensure the diverter is installed on the downspout first.
- Once that is in place, you can then attach the diverter to the water butt. Always start with the downspout. You can always move the water butt to the appropriate place, however, you will find it rather difficult to move the house.
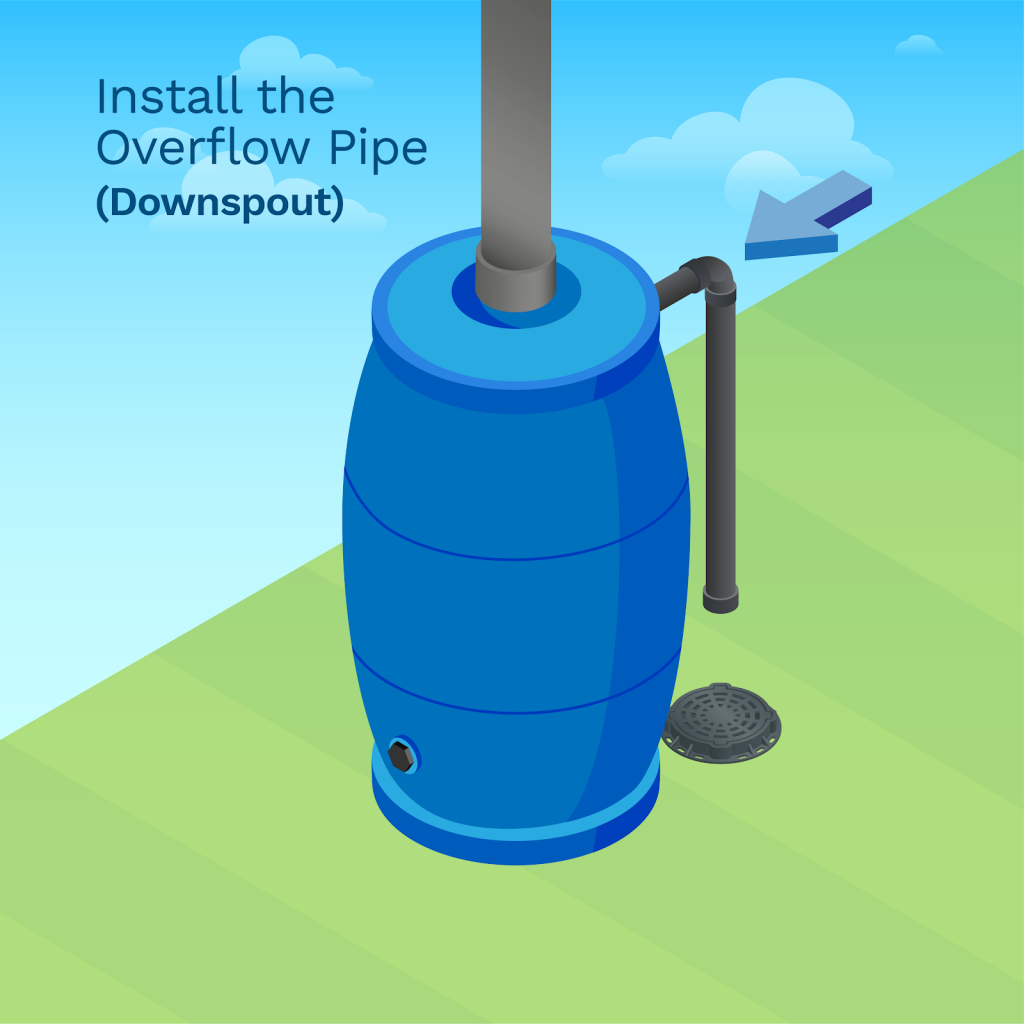
Step 4: Install an Overflow Pipe (Downspout Installation)
If you’re using a downspout installation, you will need to install an overflow pipe. This is a pipe that will allow water to overflow into the drain. You should have an overflow pipe supplied with your water butt. Follow the instructions supplied with your water butt for this installation. In most cases, this will be a simple case of attaching the pipe to the corresponding overflow hole.
Best way to use a water butt
Watering a garden can be back-breaking work, even more so when you have to carry your watering can back and forth from a water butt. To save your back, we recommend purchasing a high-quality water butt pump. This is a type of submersible pump that can sit inside your water butt, attaches to a hose or sprinkler system, and will allow you to easily transport water around your garden. The best thing is, a water butt is fairly cheap, costing only around £75. When you consider how much effort it can be to lug a watering can around all morning, a water butt pump could be the ideal way to keep your garden green and healthy.
Free Advice
If you’re struggling with advice regarding garden irrigation, ring our dedicated experts on 0800 112 3134 or 0333 577 3134. We’re open Monday to Friday 07:00 - 17:30 and Saturday 08:30 - 12:30.


